DIY CO2
HOW TO MAKE YOUR VERY OWN DIY CO2

Making your own CO2 is very easy, rewarding and a relatively short process. When creating CO2 for your aquarium you will have to take into account the size and number of bottles you will use, the recipe, the setup and diffusing.
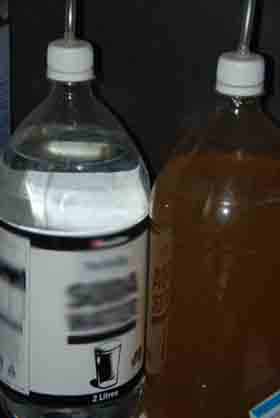
Before beginning it is important to decide the volume of bottles your aquarium will require. For a standard size 3 foot 55 gallon aquarium, two 2L coke bottles is appropriate for producing about two bubbles per second. It is important to remember that unlike pressurized CO2 with a solenoid valve, DIY CO2 cannot be switched on and off at specific times. It is therefore important to choose a slightly lower than recommended rate of CO2 for your aquarium to avoid large unwanted pH swings.
For aquariums under 25 gallons one 2L coke bottle is more than suitable. If the tank is extremely small it could be possible to use one 1.25L bottle. However very small tanks are more susceptible to unstable conditions and CO2 dosing is easier on larger, higher volume aquariums.
Equipment Check List
- Raw Sugar
- Sodium Bicarbonate
- Brewers Yeast
- Empty Half Gallon Bottles
- Drill with 3/16" bit
- 3/16 " (4mm) Rubber Tubing
- Bubble Counter
- One Way Valve
- Glass Diffuser or Cup
- Super glue

Adding the Ingredients
- Add 1 cup of raw sugar per quart (1L) of bottles used. I.e a half gallon (2L) bottle will require 2 cups of sugar. Raw sugar is cheaper and contains more complex carbohydrates that take the yeast longer to break down.
- If you do not have a funnel on hand, a piece of paper can be rolled into a cone and the sugar poured into the bottle.
- Fill the bottle to the start of the neck (allow some room) with warm water. Hot or boiling water will kill the yeast, the water should only be slightly warm to the touch.
- Add to the bottle half a teaspoon of sodium bicarbonate to act as a buffer and keep the pH stable over a longer period of time.

Adding the yeast
- Brewers yeast is preferred over bakers yeast as it has been cultured and bred to withstand higher alcohol levels. This means the yeast will continue to produce CO2 for longer periods of time.
- However brewers yeast is more expensive and less available. Bakers yeast is suitable but will require more maintenance.
- Add one third of a teaspoon of yeast per half gallon bottle. Adding more yeast will only shorten CO2 production and adding less yeast will reduce the output of CO2.

Initial Phase
- After adding the yeast to the bottle (which will most likely be floating on top of the solution), recap the bottle and shake. Continue to shake until it is well mixed. It is impossible to 'damage' the yeast in this phase but imperative that the yeast become saturated. If done correctly there will be a slight foam at the water surface in the bottle.
- Let the solution and yeast sit without a cap for anywhere between 2 and 12 hours. Be sure that the bottle is unsealed as the yeast will begin to release CO2 and you may risk the bottle exploding.
- If successful there will be visible bubbles in the bottle rising from the bottom to the surface. These small constant streams are bubbles of CO2 being released by the yeast as they consume the sugar.
- If during this period there is no visible sign of CO2 production, first check the expiry of your yeast. Yeast has a short expiry and often needs to be recently purchased for this purpose. Ensure the water temperature was not too hot for the yeast and re-check what additives were in the bottle.

System Setup
- Take the bottle cap and use the drill to produce a 3/16 " (or the same diameter as the tubing) hole in the center of the lid . Be sure to remove any plastic debris from this.
- Feed one end of the tubing about an inch through the hole in the lid and ensure it is a snug fit. Use the super glue to make an airtight seal around the edge of the rubber tubing both inside and outside the cap. The glue may not seem necessary but it is a good cautionary measure to ensure the CO2 does not leak out as the bottle will be under pressure.

- If you have multiple bottles, a T line connector (or X connector depending on the number of bottles) will need to be used to connect them into a single output.
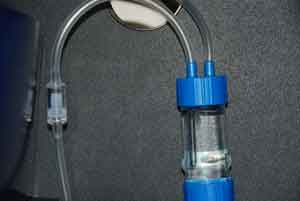
- Connect the other end of the tubing from the bottle or T connector to a one way valve with 3/16 " connectors. This will prevent your tubing from siphoning your entire tank when the bottle pressure drops.
- Fill the bubble counter with water as per instructions. There are a number of different types but they all achieve the same end result. Push tubing onto the other end of the one way valve and then connect to the bubble counter. The bubble counter may have to be screwed into the cabinet or stuck onto the glass to prevent it moving.
- Connect the final piece of tubing to the outlet of the bubble counter and ensure you leave enough length to go over and into the aquarium.
- It is an excellent idea to add another T connector at some point of the tubing in your DIY setup. Push blue tack or plasticine firmly into the third open connector. This will allow an emergency pressure escape in the event the system has a blockage and minimizes the risk of the bottles exploding.

Diffusing the CO2
- A glass diffuser is a cheap and obvious choice. However for DIY CO2 it can become clogged with a fine film that is a byproduct of the yeast. It is necessary to clean this film with a toothbrush each week to ensure CO2 can be released. Listed below are more suitable methods for DIY CO2.
- By turning a submerged bell or glass upside down in the aquarium anchored to the glass or substrate. The CO2 bubbles float into the upturned cup and allows exchange between the aquarium water and the CO2. This is a good method for the CO2 to be absorbed into the aquarium but can be unsightly.
- CO2 can also be diffused by feeding the tubing directly into the filter intake. In this way the bubbles become broken up and quickly absorbed into the system from the filter turbine. Some canister filters are unsuitable and will fill up with air and make large amounts of noise.
- Another more intensive but efficient method is to buy a very small water pump and plastic container. Connect the outlet of the water pump to one end of the container and drill holes in the other end of the container. Push filter wool inside the container to the end with the holes. Now when switched on there is a small contained vessel in which water is being pumped through inside the aquarium. At this stage drill a small 3/16" hole in the side of the container and insert the CO2 tubing. The CO2 bubbles will be trapped in the chamber by the filter wool and will dissolve quickly as the water circulates through the chamber.

Testing CO2 Levels

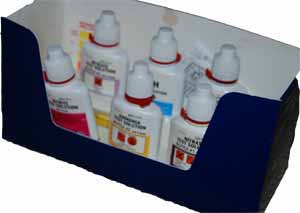
- You Can test the levels of CO2 in your tank through a KH/PH chart. To use this you will need to purchase a pH indicator test kit (highly recommended to have one of these in general) and a KH indicator test kit. There are a number of basic calculators (and even print out charts) online that can give you a fairly accurate CO2 level of your aquarium using these two values.
- It will prevent any unnecessary loss or death of the aquariums first inhabitants. Please follow the next part of the guide by following the cycling link below.


